ROBOTICS – ELECTRONICS – COMPUTER PROGRAMMING
Last updated 6/29/1016
Update Notes: I just bought two Rasberry Pi 3 model B’s, and have not yet updated this page to reflect the projects I’m working on. The conversion of my autonomous grow system from the Arduino platform to the Armv7 Rasberry Architecture using the Jessie Rasbian OS. What I aim to ascertain with the Rasberry Pi is the following objectives.
OBJECTIVES
- Run a linux distribution known as Rasbian on the Pi architecture. Duplicate the electronic digital pin outputs from my Arduino Uno R3, to a circuit read, and controlled by the Rasberry Pi
- Host an apache web-server serving a wordpress site with an MySQL backend (LAMP) website with php scripting to “Control” the GPIO’s (general purpose input / ouput).
- Configure my routers port forwarding to permit remote control of the grow room via anywhere on earth that I have a computer and internet connectivity.
- Put together a sales plan to market my idea to local businesses that could benefit from my engineering feats.
————————————————————————————-

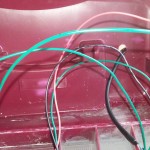
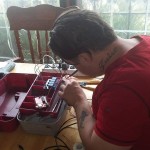
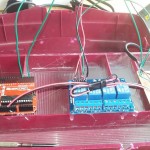
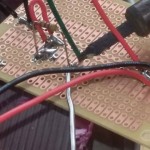
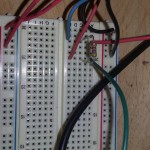
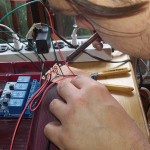
Below is an automated grow system I built with electronic component’s and an 8bit Arduino micro-controller and I programmed it in C++ to automate the process of feeding, and growing plants simulating a terrarium.
The system monitors temperatures, and will relay a 120v fan to exhaust heat from the room. On timed intervals it will power on 120v water pumps and automatically feed the plant’s. I built this project in mind of packaging it as a product and selling it, but I have not yet made this commitment. I am also working on automating a robotics arm, and much more when time allows. I have an idea to control a rocket with barometers and parachutes, and hope to comprehend the “Radar” unit that can be integrated with arduino C++. More project’s to come as time and money allows.
Download the DallasTemperature.h and OneWire.h below!
DallasTemperature.h
DallasTemperature.h Download Here
OneWire.h
**UPDATE*** I have since Implemented this system into production !
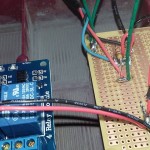
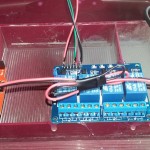

Arduino code for automating temperature sensors which switch on 120v relayed devices. The Schematic, and my source code is below. This is V2.

**NOTE: If you copy and paste the code below into the arduino compiler you will get error stray ‘\342’ .. it’s because the quotations below get changed in the string literal. So copying an pasting will change ” ” to a different type of quote. Simply edit the quotes in string litterals to correct this. It’s a problem copying from the website html\css to your editor.
DOWNLOAD: CodysGrowSourceCode
#include <OneWire.h>
#include <DallasTemperature.h>
#define ONE_WIRE_BUS 2 //pin 2 for temp feedback
int relay2 = 5; // relay pin 5
int relay4 = 7; // To turn on relay 4 pin 7’s digital pinMode
int led6 = 6;
int blink5 = 0;
unsigned long dayscount = 0;
unsigned long counter = 0;
OneWire oneWire(ONE_WIRE_BUS);
DallasTemperature sensors(&oneWire);
double temp;
void setup()
{
//pinMode(relay2, OUTPUT); // power up relay
//digitalWrite(relay2, LOW);
Serial.begin(9600);
Serial.println(“Testing OebelPonics”);
sensors.begin();
}
void loop()
{
delay(1000); // Counting seconds for days
dayscount++;
blink5++;
if(blink5 == 5)
{
pinMode(led6, OUTPUT);
digitalWrite(led6,HIGH);
blink5 = 0;
}
else
{
digitalWrite(led6, LOW);
};
if(dayscount == 45000) // Number of seconds to delay times this by 2 due to counter is multiplier variable.
{ counter++; dayscount = 0; }; //Due to 8bit procesing registers and int’s being short’s in range this is multiplier.
if(counter == 2) //(dayscount == 50000)//15000 How many seconds before turning on
{
for(int i = 0; i<= 90;i++)
{
// This will power on the pump for 90-seconds
delay(1000);
pinMode(relay2, OUTPUT);
digitalWrite(relay2, LOW);
}
dayscount = 0;
counter = 0;
}
else
{
digitalWrite(relay2, HIGH);
}
Serial.println();
Serial.print(“Requesting Temperatures…”);
sensors.requestTemperatures();
Serial.println(“DONE”);
Serial.println(“The Temperature is: “);
temp = sensors.getTempFByIndex(0);
Serial.print(temp);
if( temp >= 85.00 ) // TEST TEMPERATURE … if above target heat levels turn on fans via relay 4, and pin 7.
{
pinMode(relay4, OUTPUT);
digitalWrite(relay4, LOW);
}
else
{
digitalWrite(relay4, HIGH);
}
// delay(1000);
//exit(0); // exit program
}